Pushover Integration Guide
Overview
Integrating Pushover with UptimeObserver allows you and your team to receive real-time alerts and status updates directly to your devices. This ensures that you and your team can quickly respond to downtime, latency issues, and other incidents affecting your websites or services.
Note
This integration is available on all UptimeObserver plans.
Prerequisites
Before setting up this integration, you'll need:
- A Pushover account (sign up at pushover.net)
- The Pushover app installed on your device(s)
- Your Pushover User Key (found on your Pushover dashboard)
Step-by-Step Guide
- Go to UptimeObserver and log in to your account.
- Navigate to the Integrations section from your dashboard.
- Choose Pushover from the list of available integrations.
- Click on "Add Pushover User"
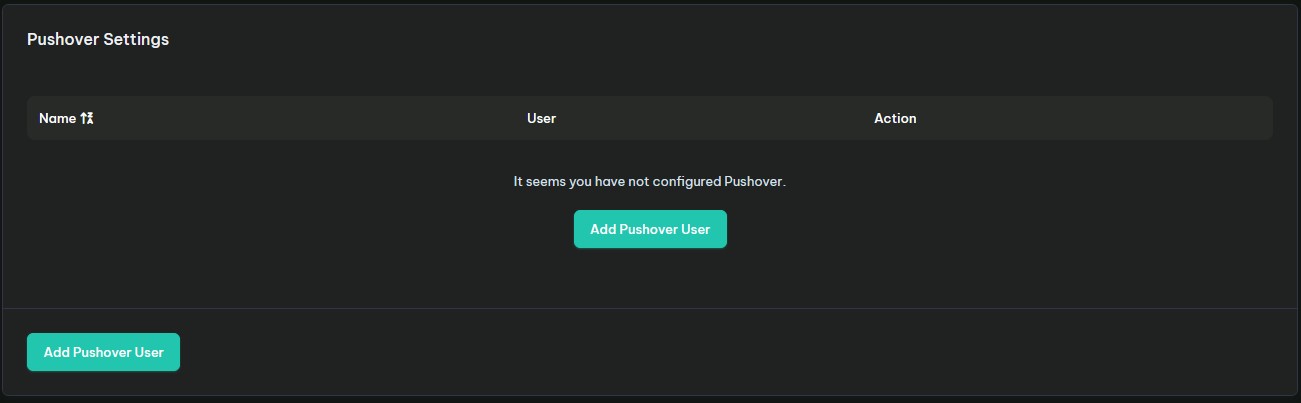
- Fill in the required fields:
- Friendly Name: A descriptive name for this configuration (e.g., "John's Phone" or "On-Call Device")
- User Key: Your Pushover User Key found on your Pushover dashboard
- Device (optional): Specify a particular device to receive notifications, or leave blank to send to all devices
- Click Save to create the integration.
- Test the integration by clicking the Test Button 🧪 next to your configuration.
Enabling Alerts on Monitors
After you have successfully integrated Pushover with your UptimeObserver account, you must manually assign which monitors should send alerts.
- Navigate to Monitors: From your dashboard, click on the specific monitor you wish to configure to enter its Monitor Detail page.
- Add Alert: Find the alerting section and click the Add Alert button.
- Select Alert Type: In the Alert Type dropdown menu, select Pushover.
- Choose the Event: Pick the relevant trigger from the Event dropdown (e.g., Monitor Down, Monitor Up).
- Select Configuration: Choose your Pushover configuration from the dropdown.
- Set Priority: Choose the priority appropriate for this alert. New and existing alerts use Normal by default.
- Configure Emergency alerts: If you choose Emergency, set the retry interval and expiration period. See Emergency alerts for the allowed values and behavior.
- Save Changes: Click the Save Changes button to activate the alert.
Recommendation
We recommend setting up alerts for both "Down" and "Up" events. This ensures you're notified immediately when an issue starts and when it has been resolved.
Pushover Priorities
Priority is configured on each alert rule, so alerts using the same Pushover recipient can have different priorities. It can be used with every Pushover event, including Monitor Down, Monitor Up, and SSL or domain-expiry alerts.
| Priority | Value | Behavior |
|---|---|---|
| Lowest | -2 | Delivered silently, without sound or vibration. |
| Low | -1 | Delivered without sound. |
| Normal | 0 | Standard Pushover notification. This is the default. |
| High | 1 | High-priority notification. |
| Emergency | 2 | Repeats until it is acknowledged or expires. |
Emergency Alerts
Use Emergency only for incidents that need an on-call response. In addition to the priority, configure:
| Setting | Allowed value |
|---|---|
| Retry interval | At least 30 seconds |
| Expiration | 1 to 10,800 seconds (3 hours) |
Pushover repeats an Emergency notification at the configured retry interval until someone acknowledges it in the Pushover app or it reaches its expiration time. UptimeObserver records the acknowledgement, including its time, user, and device when Pushover provides them.
For a Monitor Down alert, UptimeObserver cancels any outstanding Emergency retries when the monitor recovers, before it sends recovery alerts. An Emergency Monitor Up alert is a separate notification and can have its own acknowledgement cycle.
Emergency alerts and alert retrigger
An Emergency Pushover alert cannot use UptimeObserver's Re-send alert while incident is active setting. Disable alert retrigger before setting the Pushover priority to Emergency, or choose a non-Emergency priority. Pushover's own retry schedule provides repeated notification for Emergency alerts.
Retry and expiration settings are only used for Emergency alerts. For all other priorities, leave them unset.
Troubleshooting
If you are having trouble receiving alerts or setting up the integration, check the common solutions below.
1. Test Button Failed or No Test Notification Received
If clicking the test button doesn't send a notification:
- Verify User Key: Double-check that your Pushover User Key is entered correctly. It should be a 30-character alphanumeric string
- Check Pushover app: Ensure the Pushover app is installed and you're logged in on your device
- Device specification: If you specified a device name, ensure it matches exactly (case-sensitive) with the device name in your Pushover account
- Pushover subscription: Verify your Pushover license is active (Pushover requires a one-time purchase per platform after the trial)
2. Not Receiving Notifications During Downtime
If test messages work but you don't receive incident alerts:
- Monitor assignment: Verify that Pushover is added as an alert on the specific monitor. Go to Monitor Detail → Alerts section
- Event selection: Ensure you selected the correct event type (e.g., "Monitor Down")
- Check Pushover app settings: Verify notifications aren't being filtered by quiet hours or priority settings in the Pushover app
3. Notifications Going to Wrong Device
If alerts arrive on unexpected devices:
- Device field: When adding the Pushover integration, specify the exact device name to limit notifications to that device
- Leave blank for all: If you want all devices to receive alerts, leave the Device field empty
- Find device names: Device names are listed in your Pushover account settings or in the Pushover app
4. Delayed Notifications
If notifications arrive late:
- Check device connectivity: Ensure your device has a stable internet connection
- Pushover priority: Edit the alert rule and choose High or Emergency priority when the alert needs more prominence
- Check Pushover status: Visit Pushover's status page to check for any service issues
5. Quiet Hours Blocking Alerts
If you're not receiving alerts during certain times:
- Pushover Quiet Hours: Check your Pushover app settings—you may have quiet hours enabled that suppress notifications
- Emergency priority: Configure an Emergency alert when a critical notification must repeat until acknowledged. It cannot be combined with UptimeObserver alert retrigger.
6. Emergency Alert Cannot Be Saved
If an Emergency alert cannot be saved:
- Check retry interval: It must be at least 30 seconds
- Check expiration: It must be between 1 and 10,800 seconds
- Disable alert retrigger: Emergency priority and Re-send alert while incident is active cannot be enabled together
- Check callback availability: Emergency notifications require UptimeObserver's callback service to be publicly available so acknowledgements can be recorded. Contact support if you receive a callback configuration error
7. How to Reset the Integration
If all else fails, try a fresh start:
- Go to UptimeObserver → Integrations → Pushover
- Delete the existing Pushover configuration
- Follow the Step-by-Step Guide above to reconnect with a fresh User Key
How to Uninstall
In UptimeObserver:
- Go to UptimeObserver and log in to your account.
- Navigate to the Integrations section from your dashboard.
- Select Pushover from the list.
- Click the delete button next to the configuration you want to remove.
In Pushover:
No action is needed in Pushover—removing the integration from UptimeObserver stops all notifications.
Need Help?
If you need help with this integration, please contact us via the support button or email us at support@uptimeobserver.com.